Getting Started with Studio
Getting going with FanKit within Studio
Logging into Studio
Studio is the interaction control centre in which you configure and control FanKit Apps. There are 4 key concepts involved:
Account - the login used to access Studio
Organisation - your organisation under which all brands and projects are kept
Brand - the specific brand you want to use to group Projects e.g. a Team, Tournament or Channel
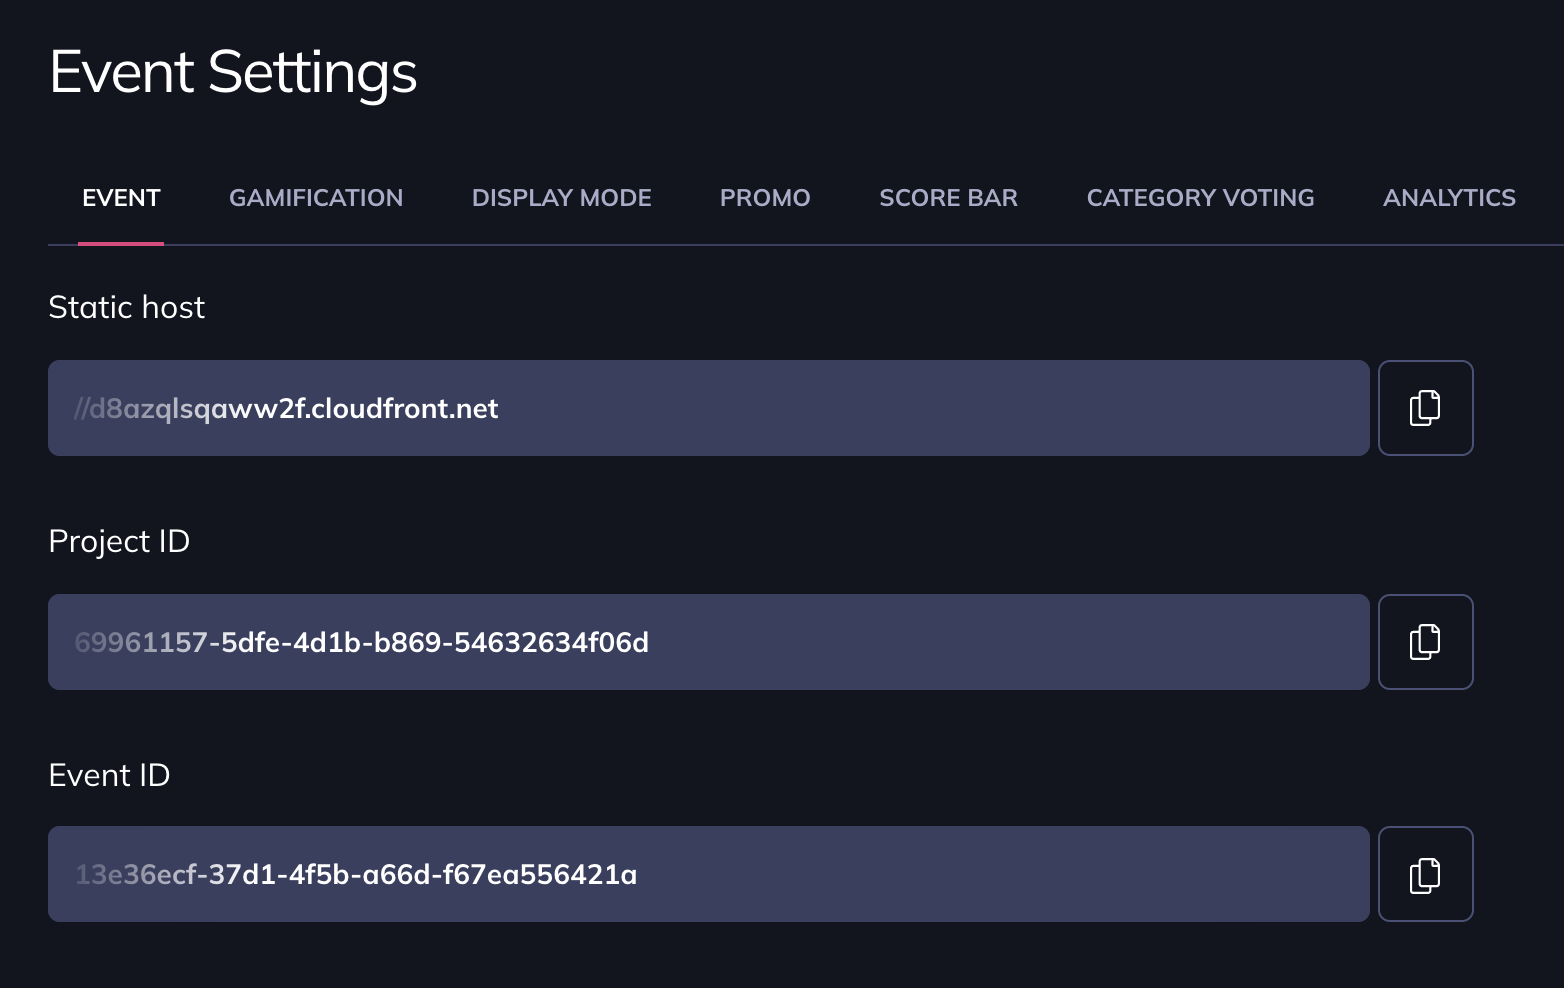
Project - the place where you can manage the look & feel and the layout of the App / Experience
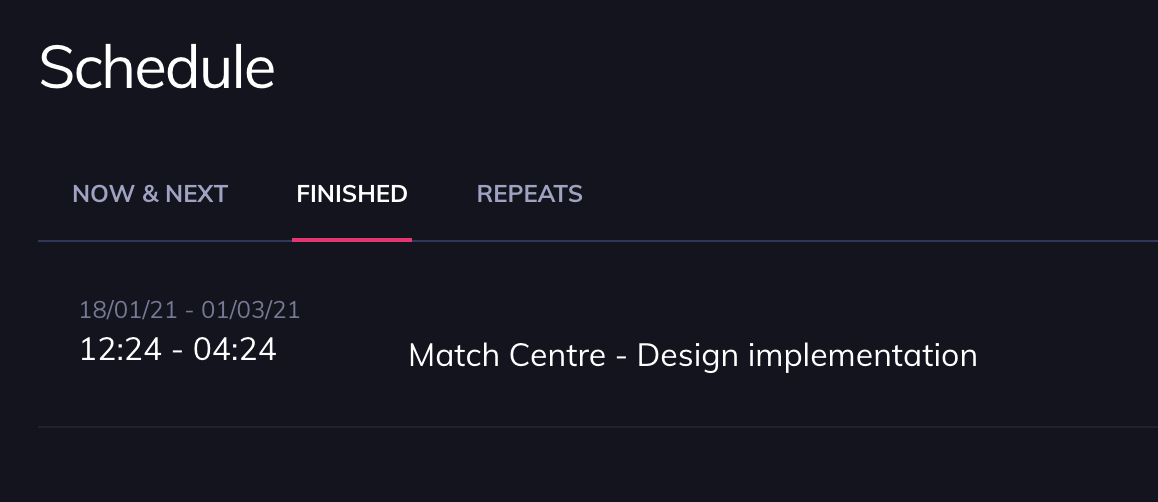
Schedule - the list of current, future or past "Events" corresponding to a period of time in which content will be available to the user.
Event - a flexible period of time where content is populated on the Timeline.
Element - a type of interactive content e.g. Poll, Gallery, Video with display options, duration and other settings
For example, a digital content producer is provided with an Account, a specific TV show would be managed in its own Project, and an episode of this show is managed in an Event which can be scheduled or managed on-the-fly. A quiz question during this episode is created and managed as an Element.
Project
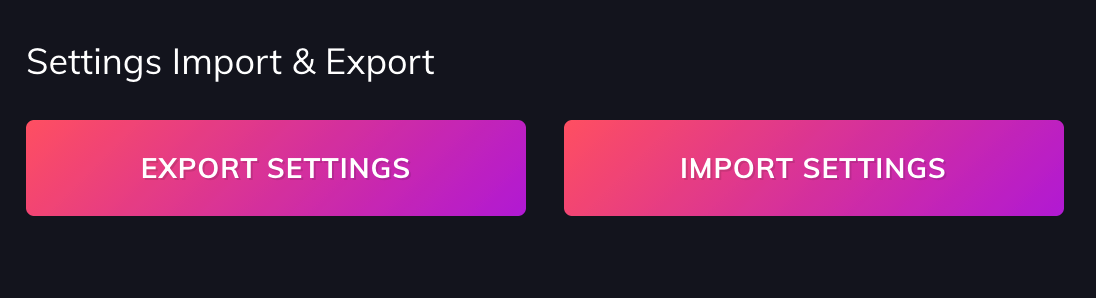
There can be several projects in same account: e.g. staging project, production project, both linked to the same version of FanKit. Staging projects are typically used for creating test content. After it has been verified, you can move all settings to production project by export / import settings.
Go to App Setup - Advanced - Export / Import
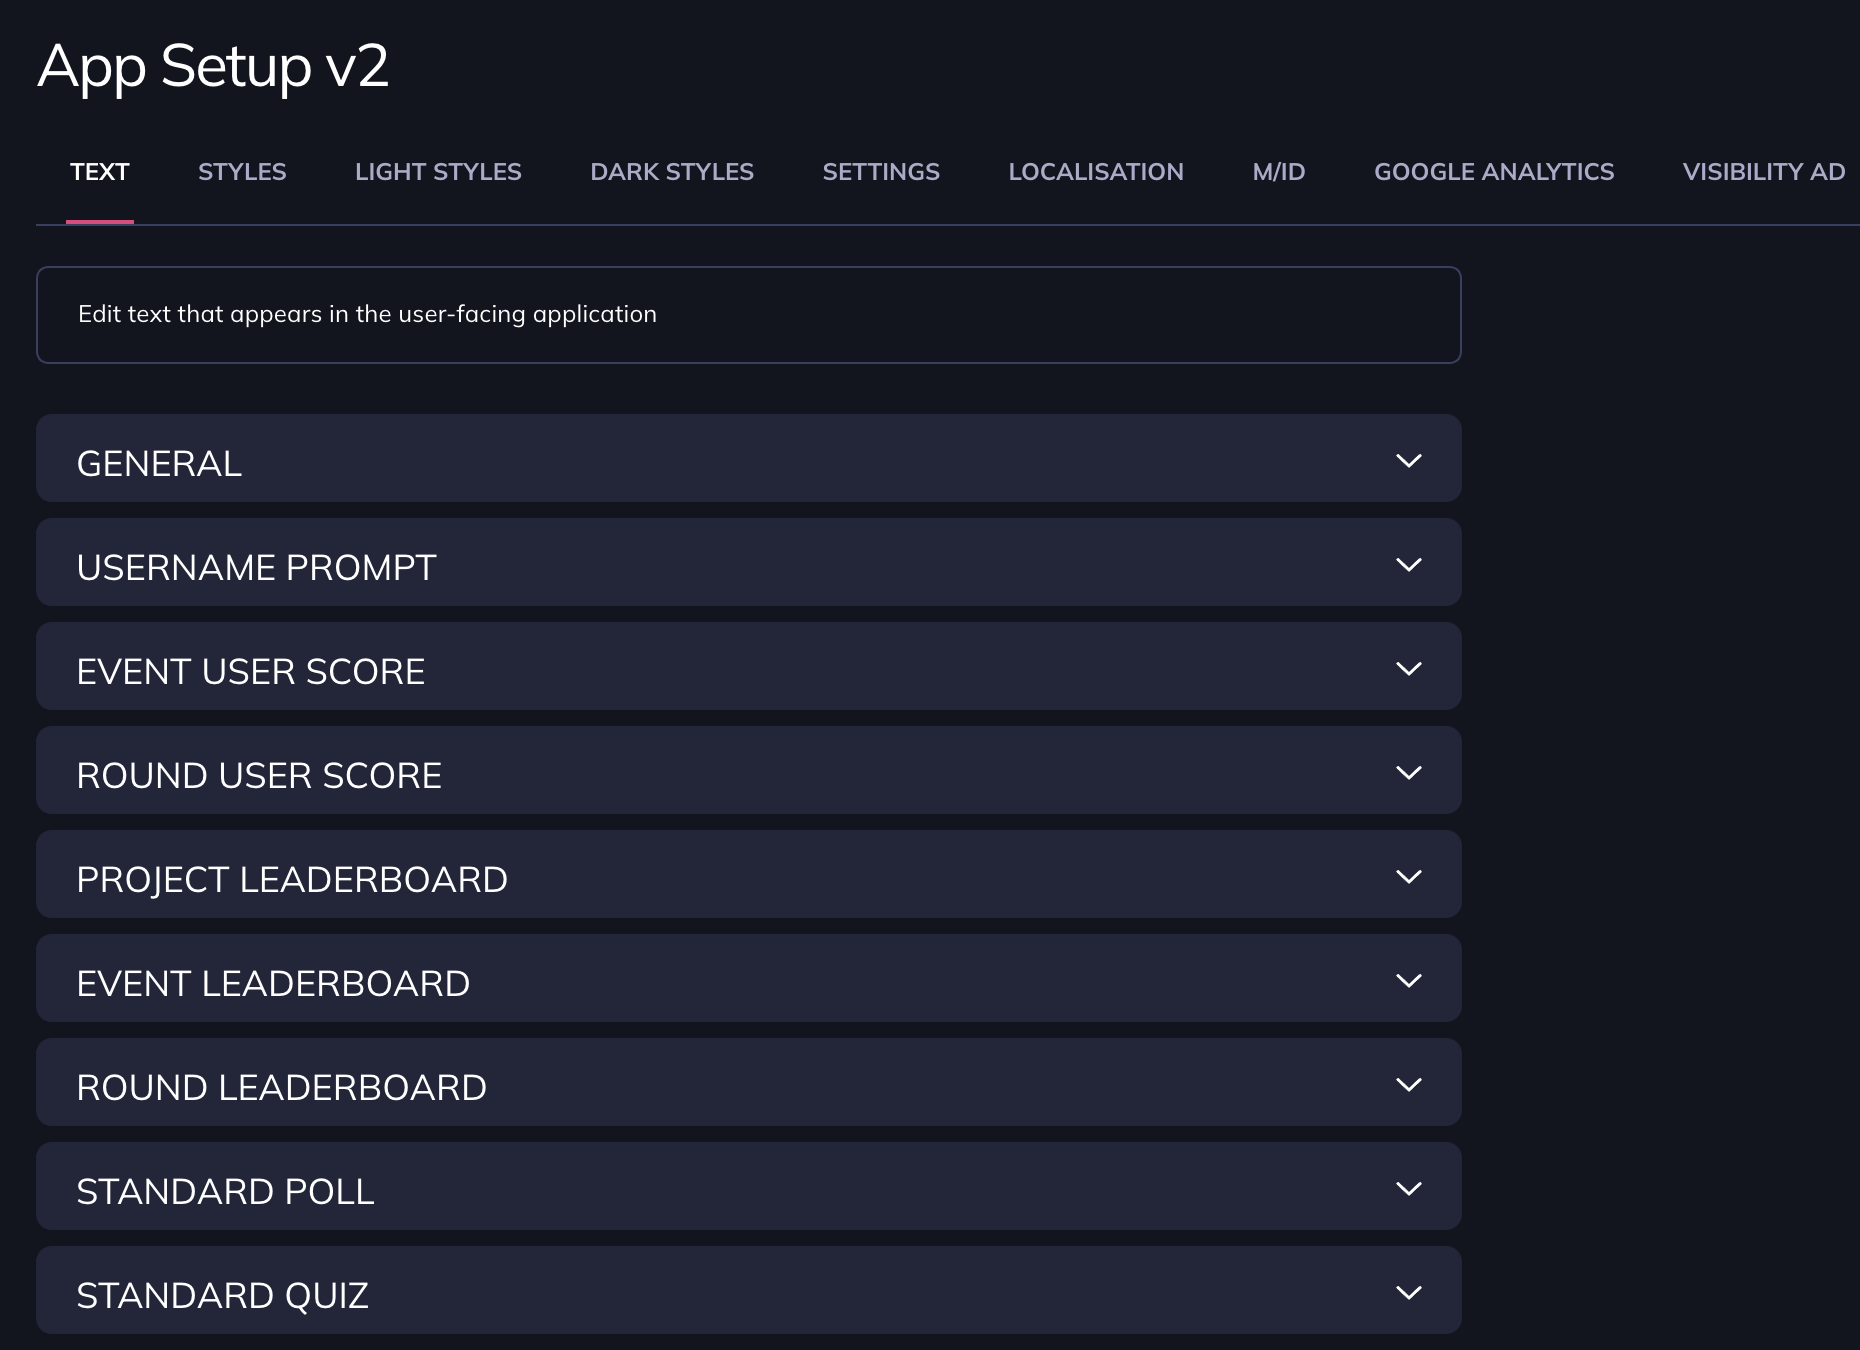
App Setup
You can change the look & feel of your experience via the App Setup menu. You can update colours, text, backgrounds and many other settings, offering flexibility.
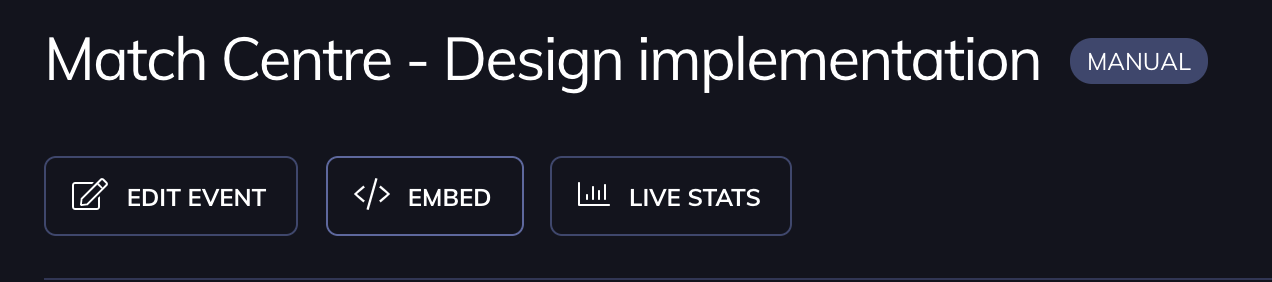
Event
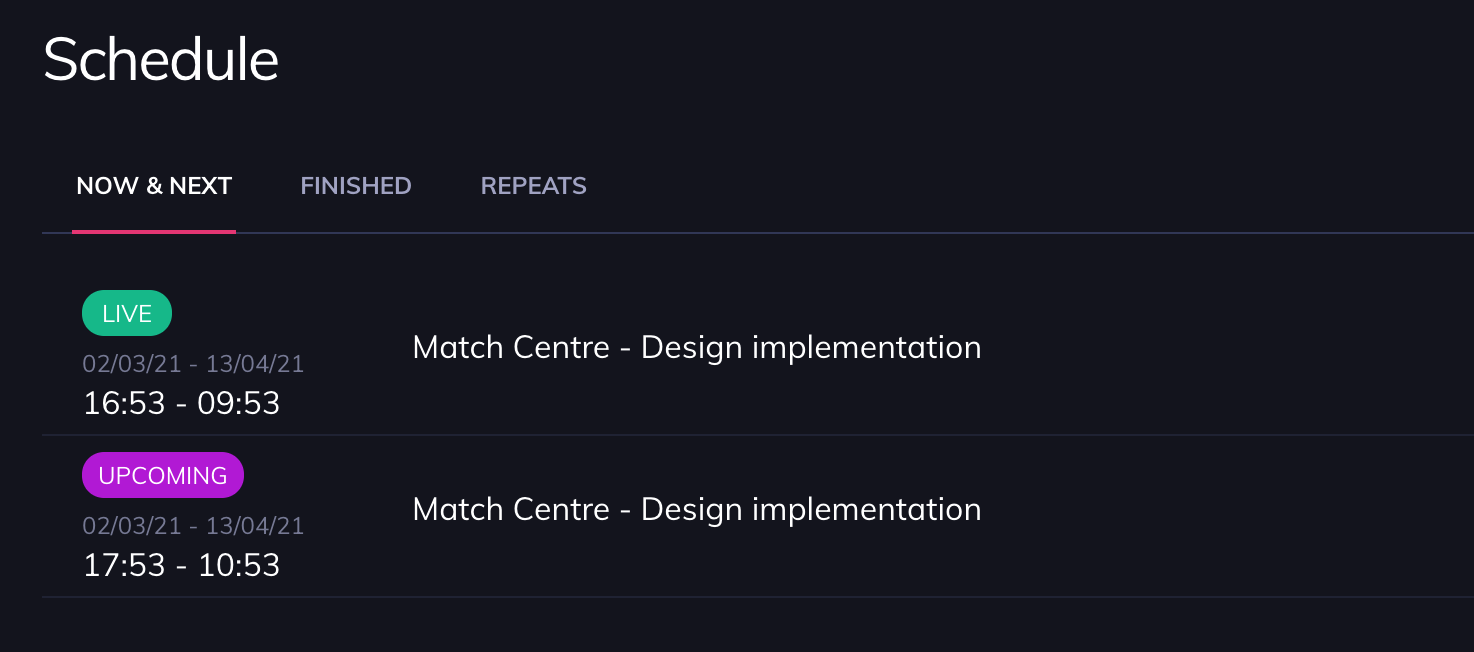
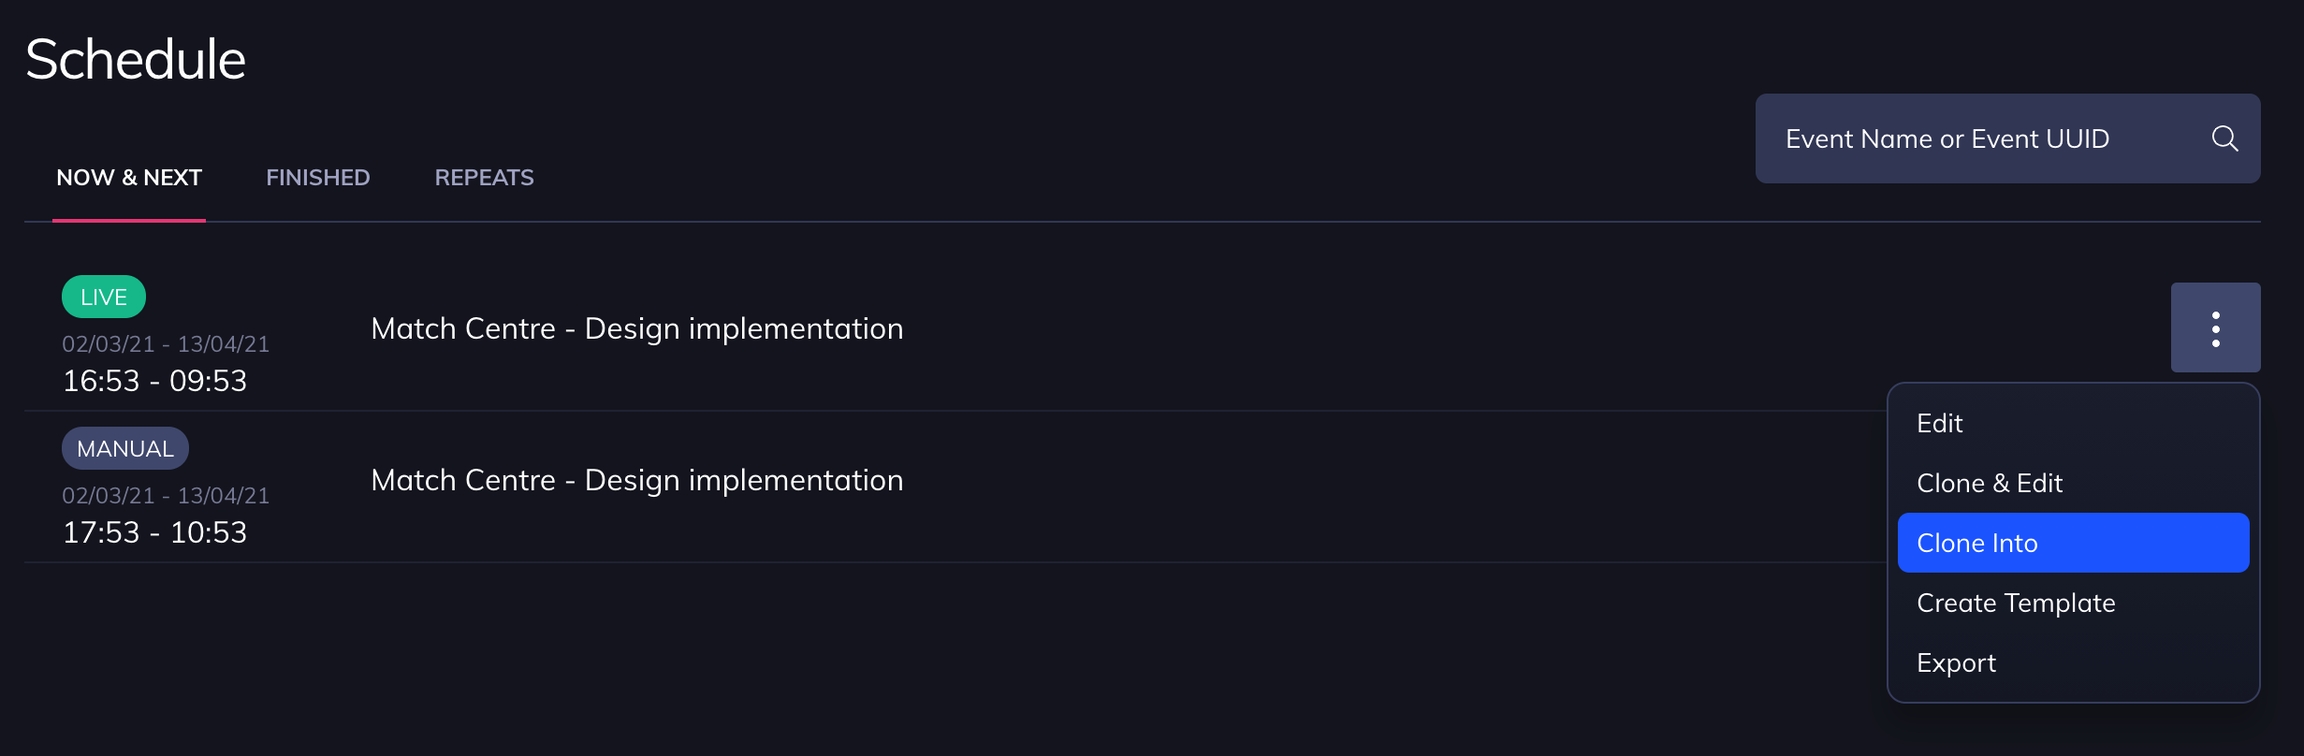
A Project can contain one or more Events within the Schedule tab. Events all have a State:
Unstarted (Manual)
The event exists and can contain content, but is not live yet
Live
This event is active and running live at the current time
Finished
When an event reaches the end of its duration, it is no longer actively publishing content and is marked as Finished
If a user is exposed to FanKit when there is no live event, the user sees a splash screen with "No live event" text. This text is editable in App Setup.
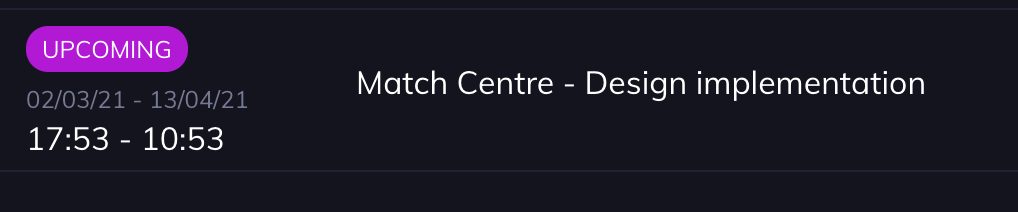
Upcoming - Scheduled future events
You can setup an event in the future with a countdown. When the countdown is over, the event is published live automatically.
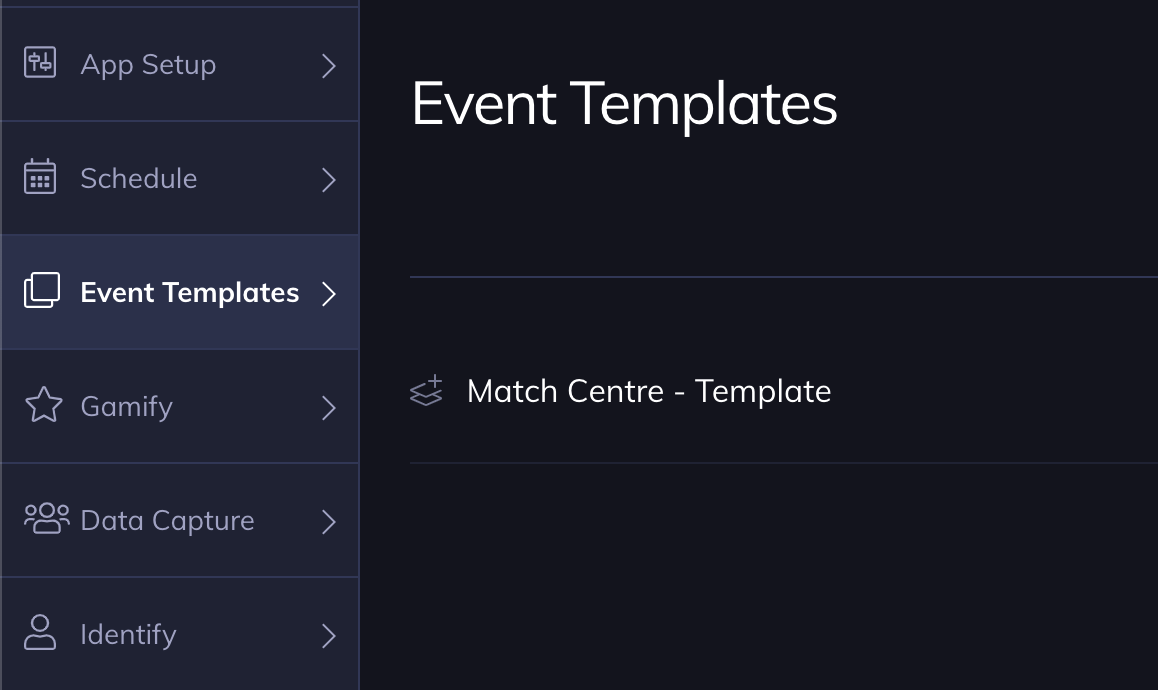
Event Templates
You can create an event template that can be reused as a skeleton for future events. For example, commonly used templates or entire timelines of content. When you want to make a new event based on a template simply go to Event Templates tab and create a new event from the template.
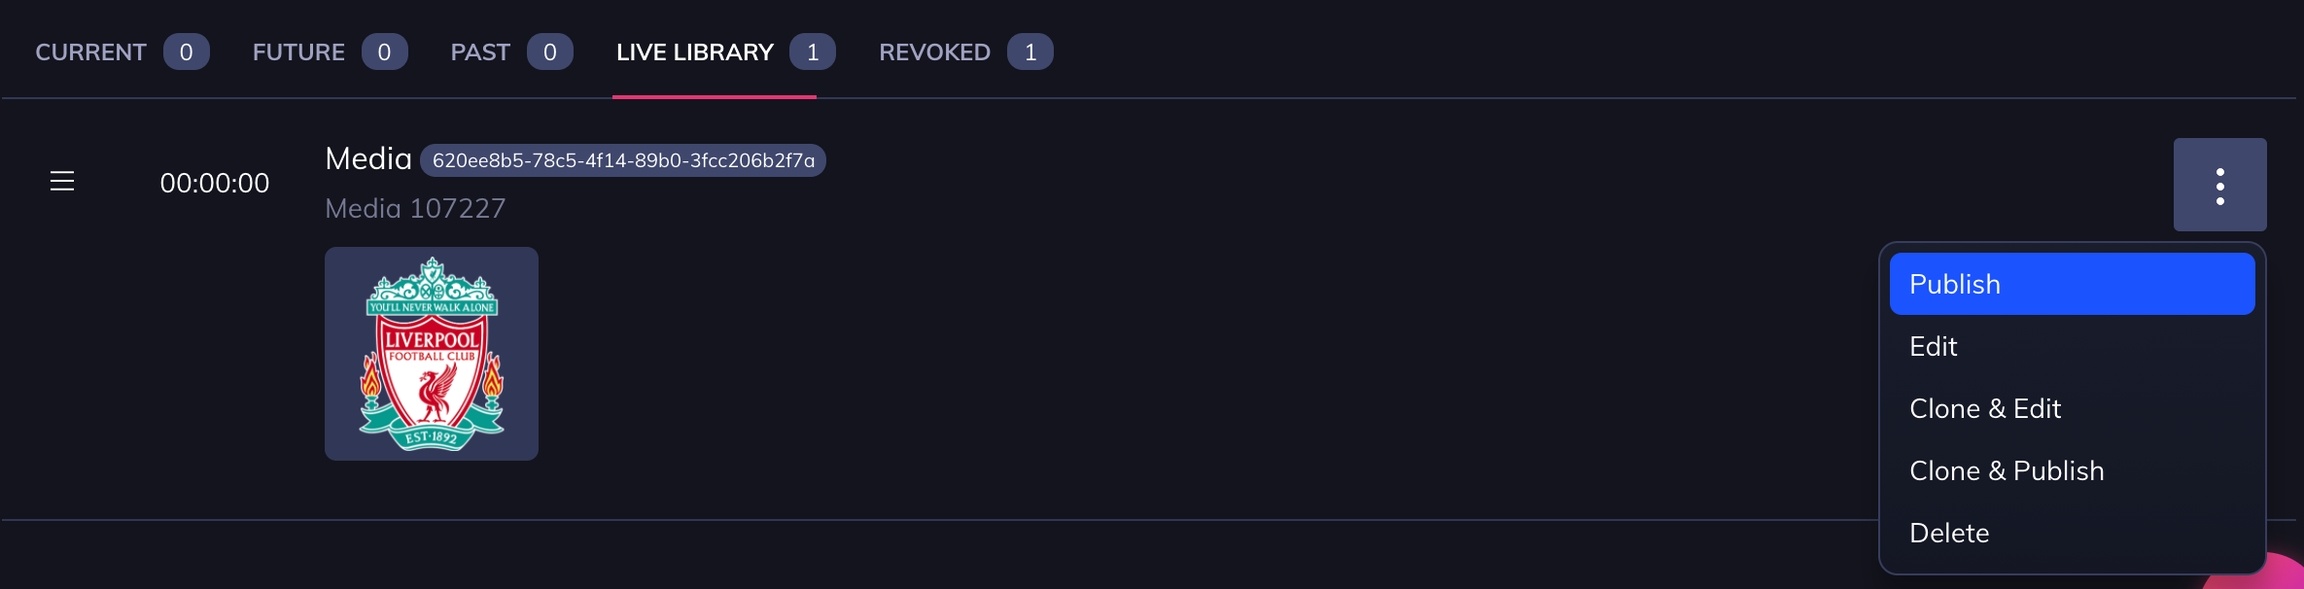
Elements
Elements are the creative building blocks, populated with content and published to the Timeline. You can create and publish other types of elements.
You can create, publish, edit, revoke and delete elements.
Create an element To create an element click the plus icon in the bottom-right and select the Element type.
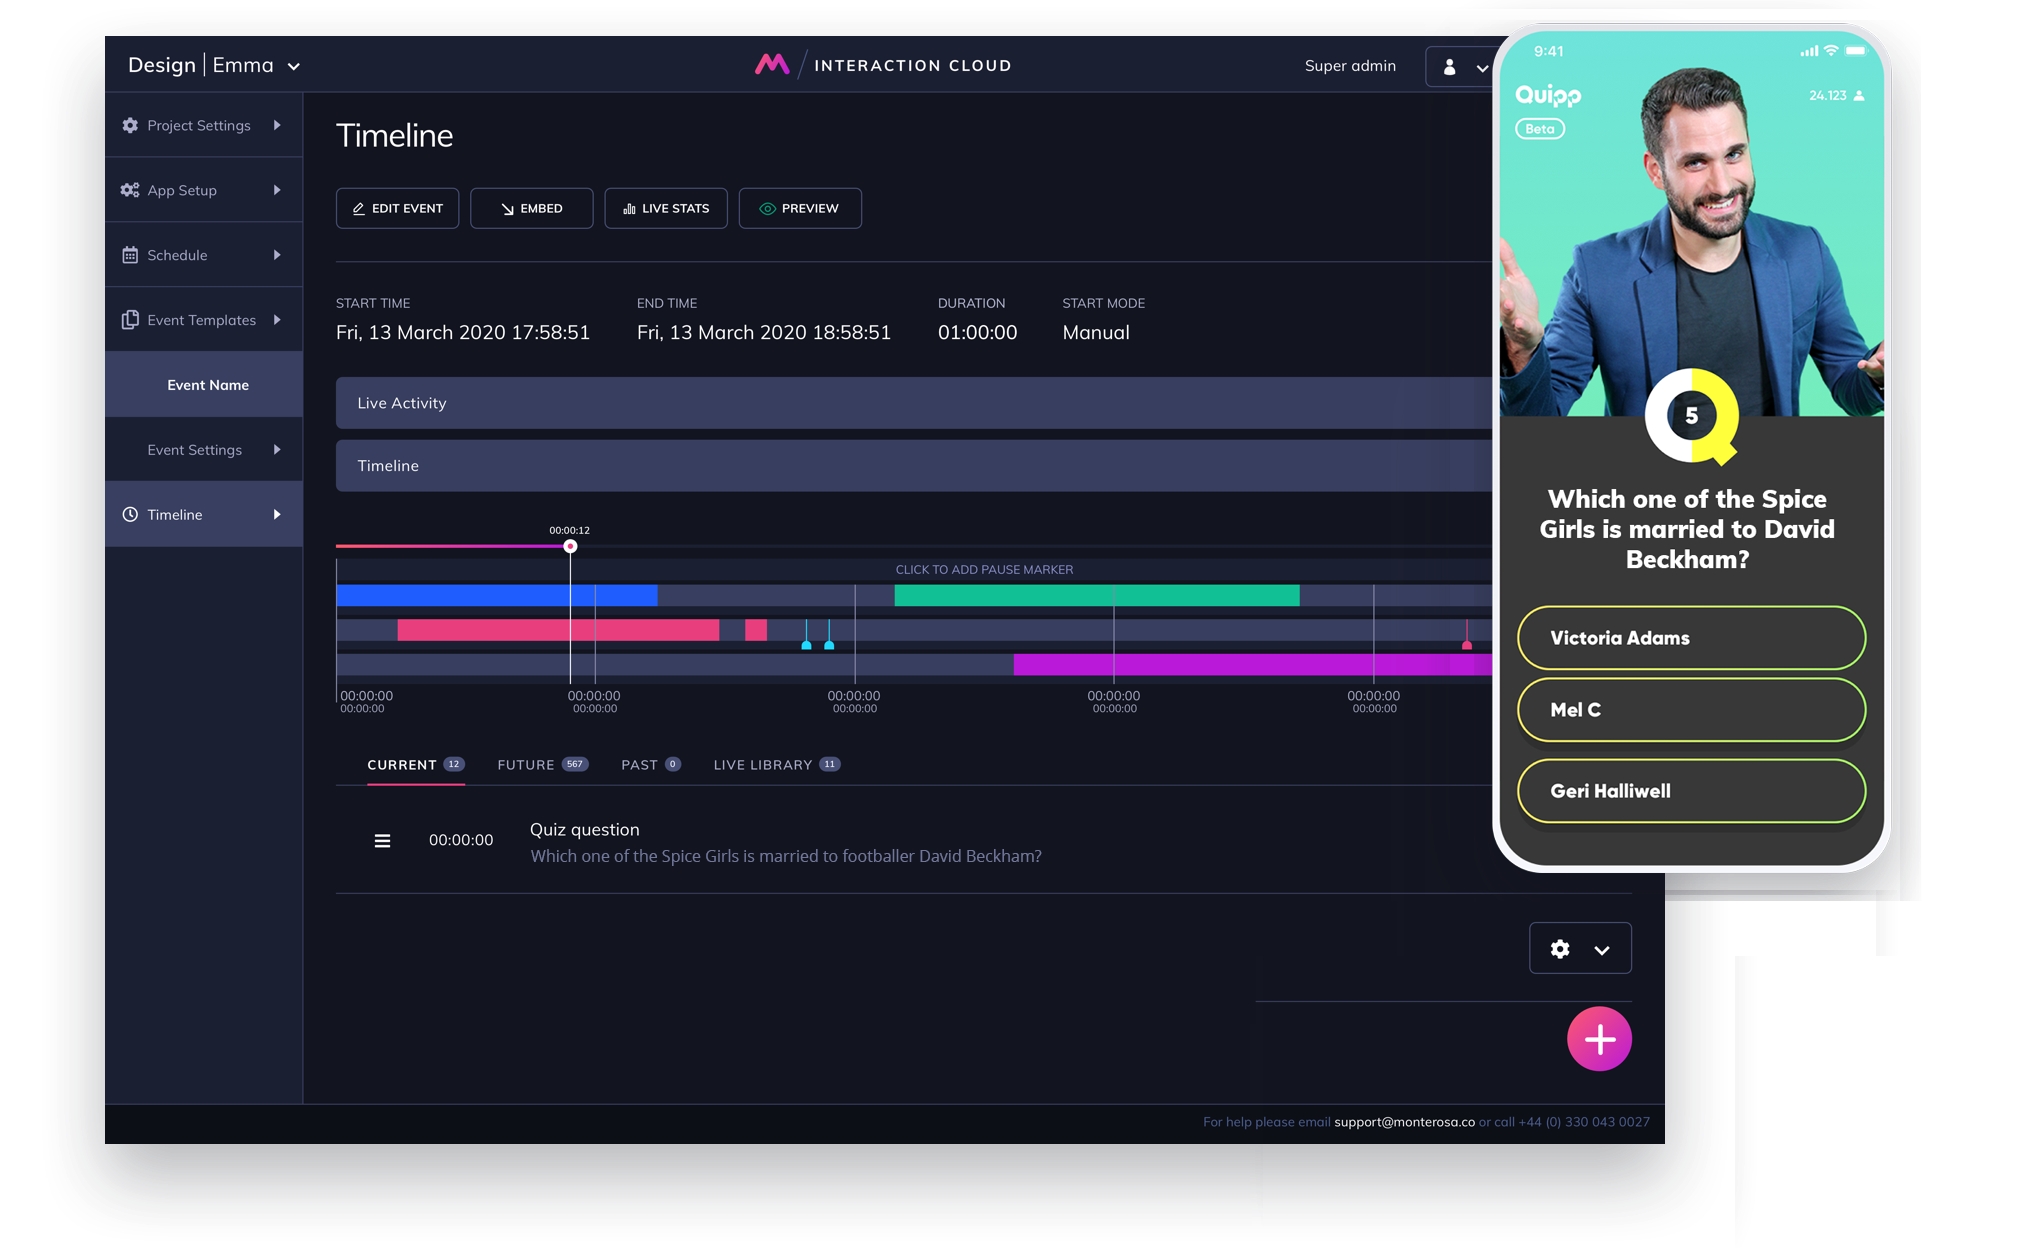
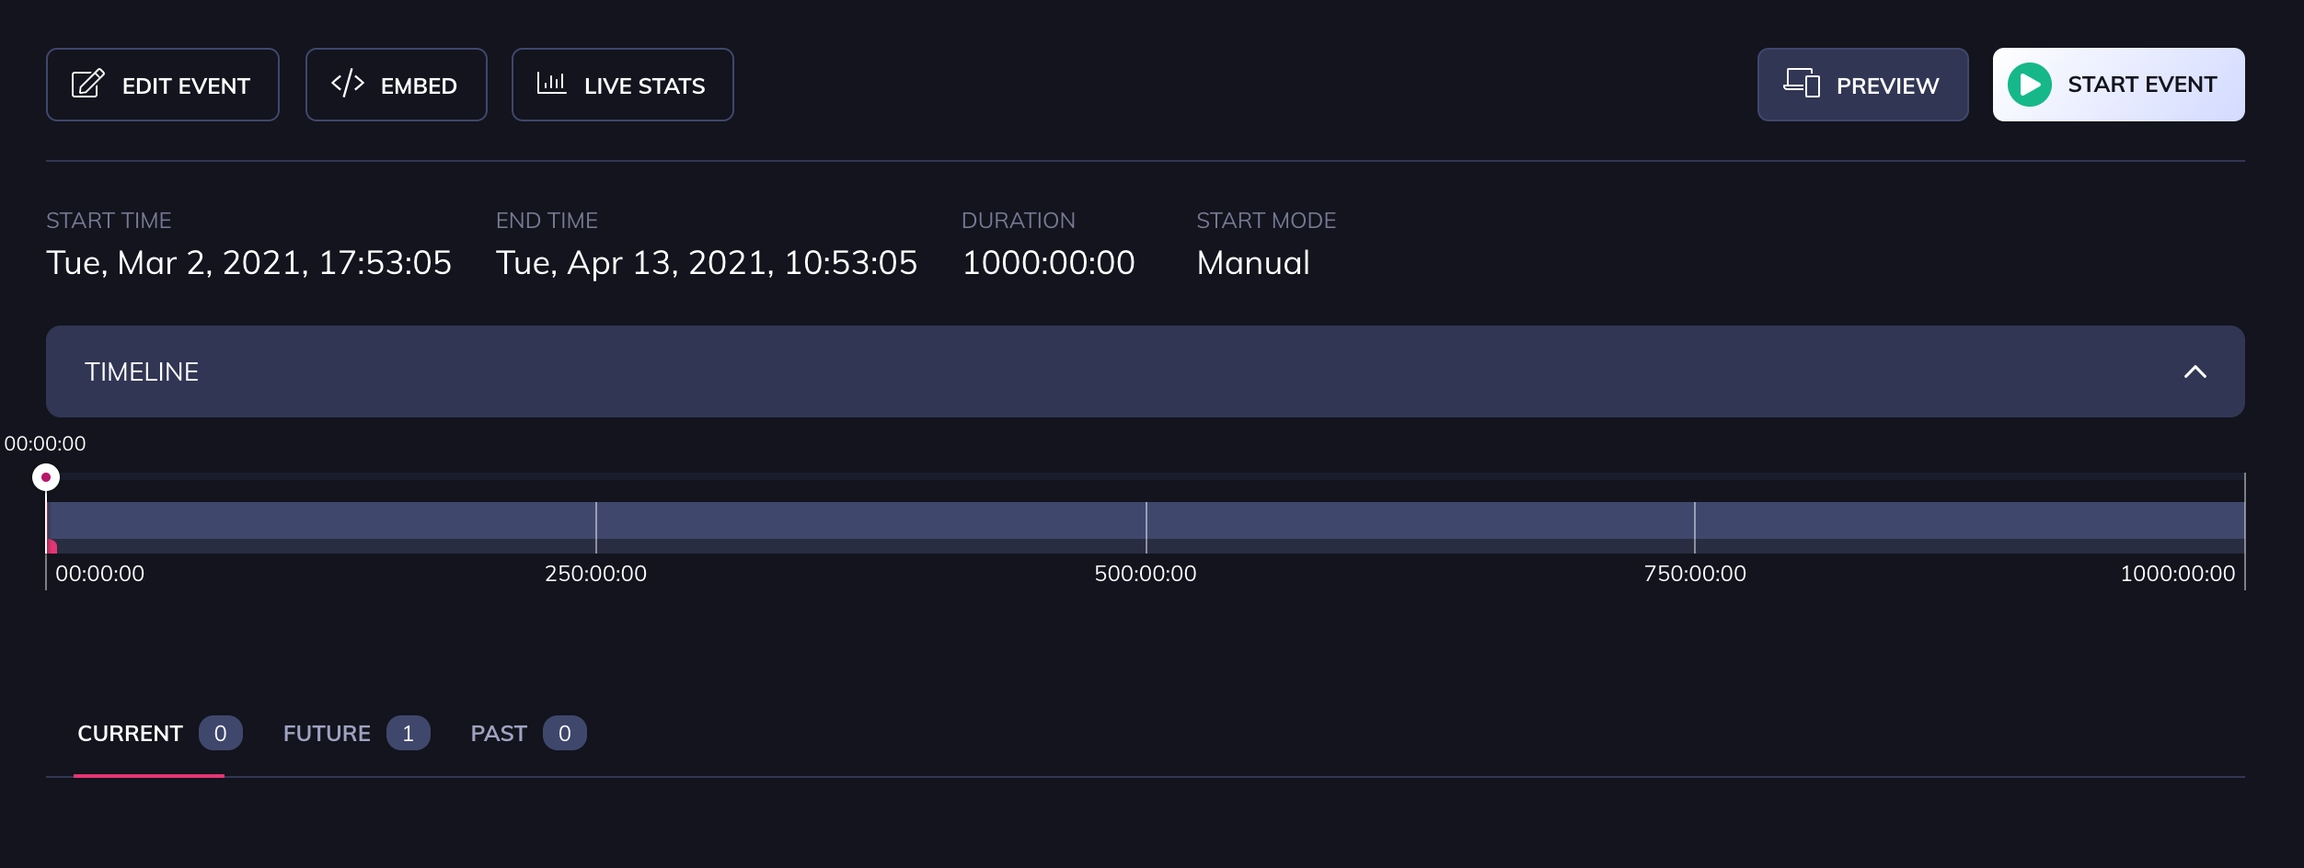
Timeline
Timeline is the area where you can see and control all elements
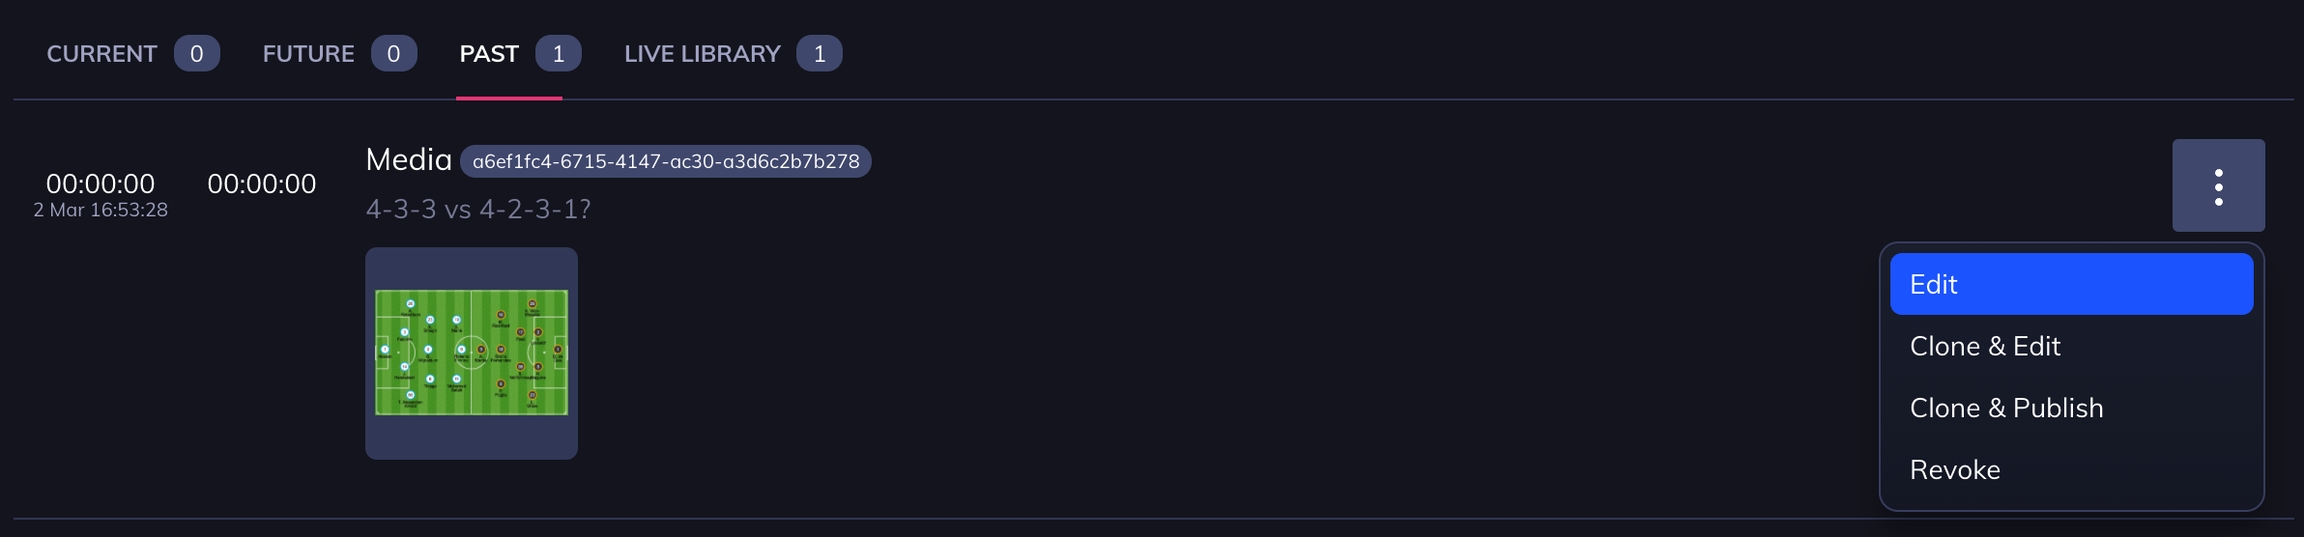
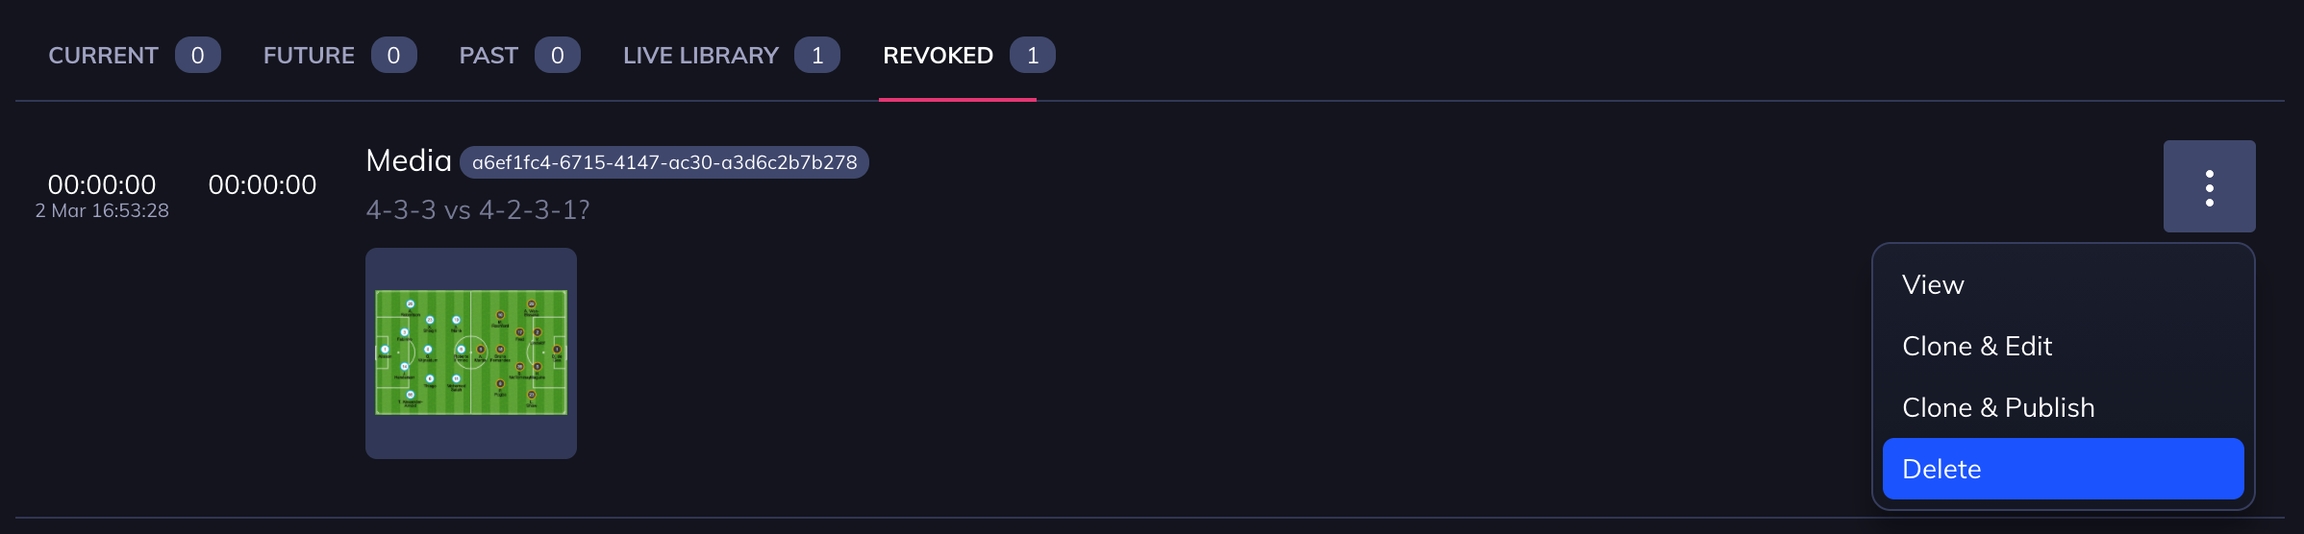
The Timeline consists of several tabs including Current, Future, Past, Live Library, Not revealed, Revoked
Current tab is a collection of Elements that are currently active. In practice this means that the element can be interacted-with, for example a poll that still has several minutes to run.
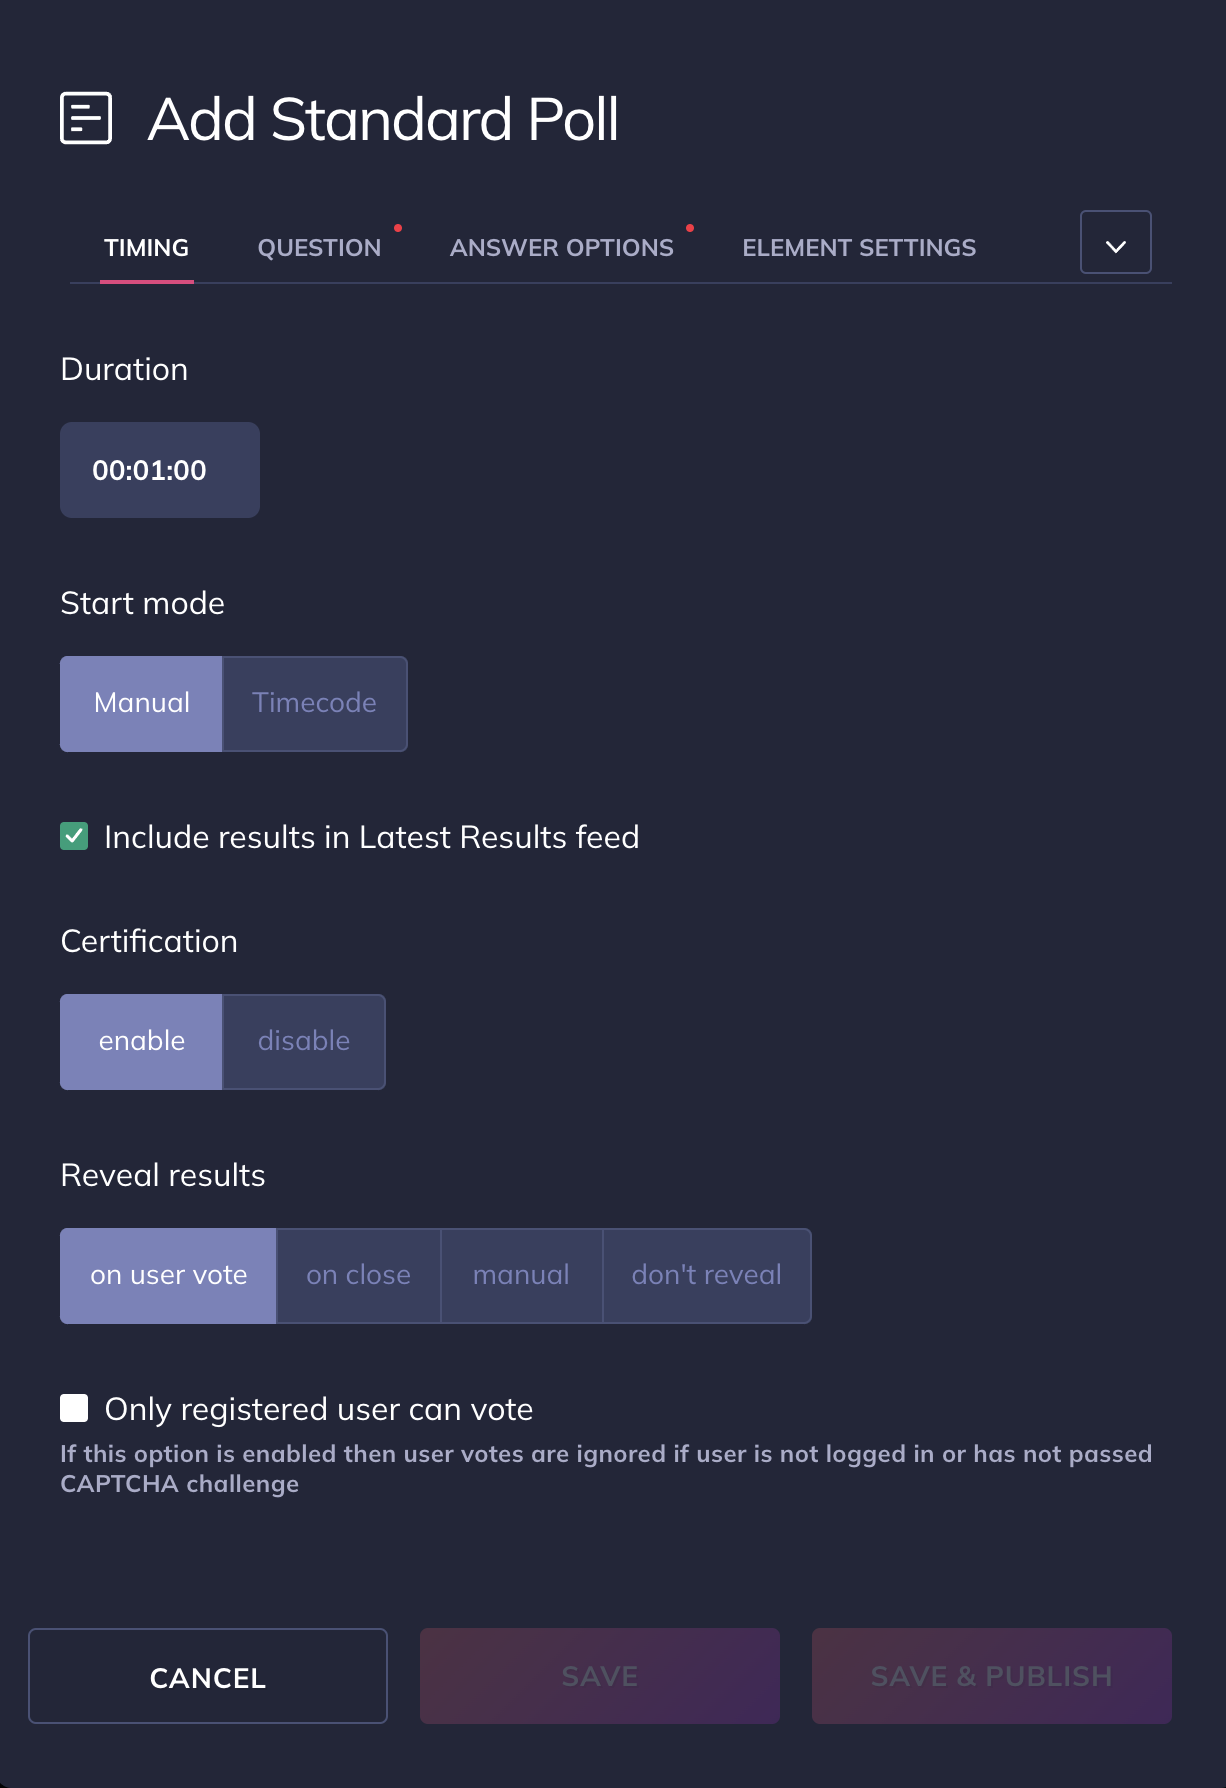
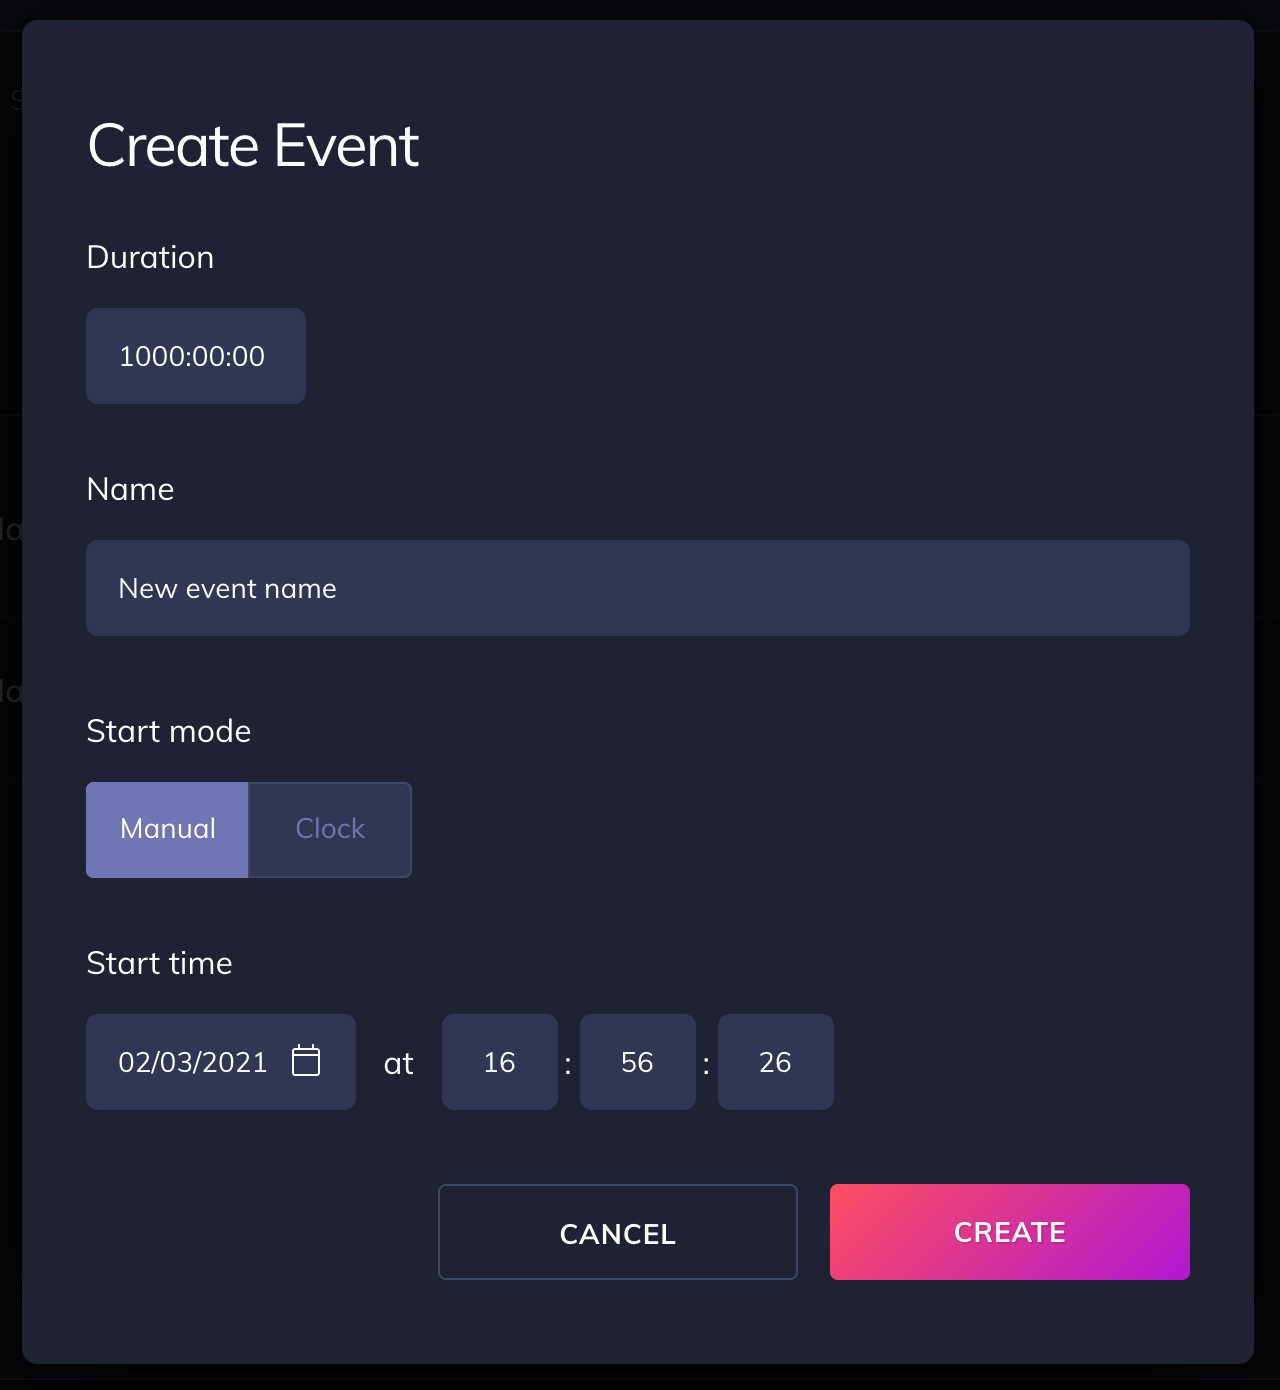
Event & Element Start Modes
Every Event has a Timing mode which allows you to schedule or start events manually. Every Element also has the same capability.
Manual - you can start Manual events from the drop-down in the Schedule tab, or if you go to the Timeline tab there is a Play button in the top-right corner.
Clock - if you select Clock time you can then pick date and time in the future and the event will start automatically
If you want to automate event starting and stopping, the platform's Control API can be used to do this programmatically
Event-level Settings
Studio supports Project-level and Event-level settings. FanKit allows you to configure a sub-set of settings on a per-event basis including Gamification, Display Mode, Promo, Navigation.
Going Live
To manually start an event, just click on the START EVENT button in the top right corner of Studio timeline. You can also start the event from the Schedule tab if you prefer.
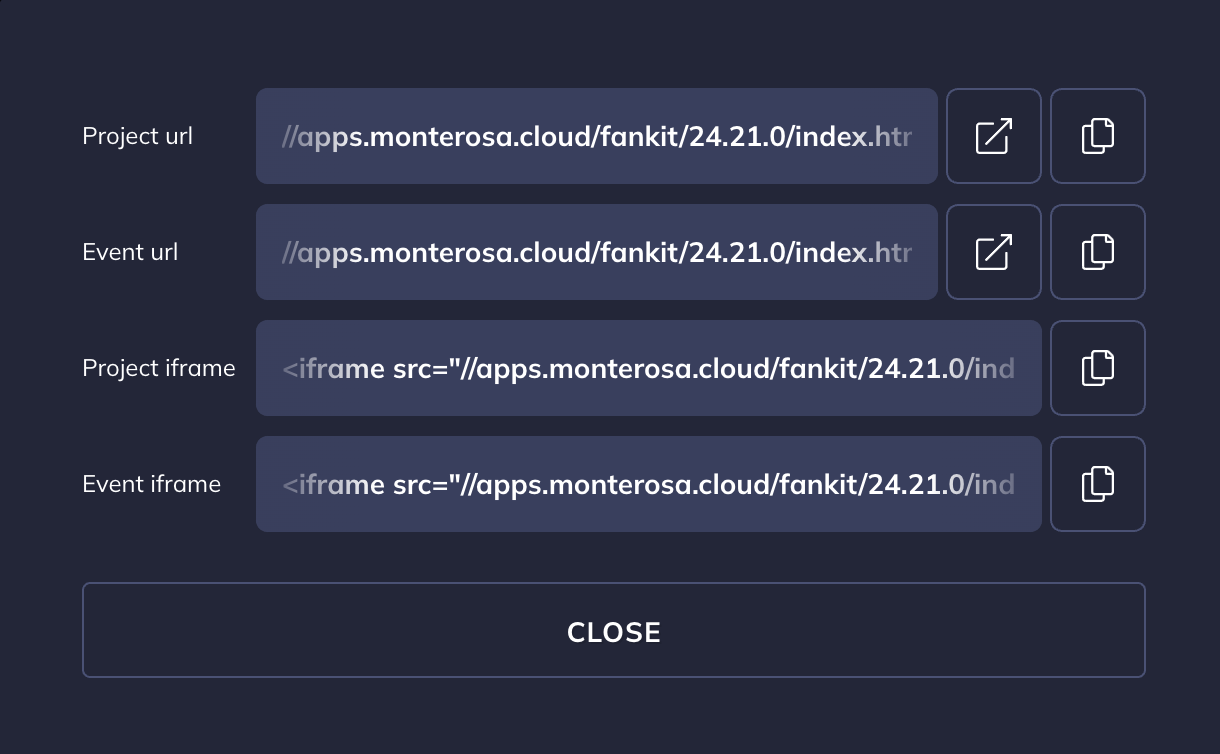
Getting your Embed Code or App URL
To access the FanKit app itself, click on the EMBED link.
A new modal window will open where you can find URLs and iFrame code ready to use. To see the fully running project you can click on the icon below, or if you want to see it working in a responsive stretchy iFrame, click on the Preview link.
Publish Elements live
Now that the timeline is running, you can publish the elements from the Live Library, or you can simply create new elements on the fly.
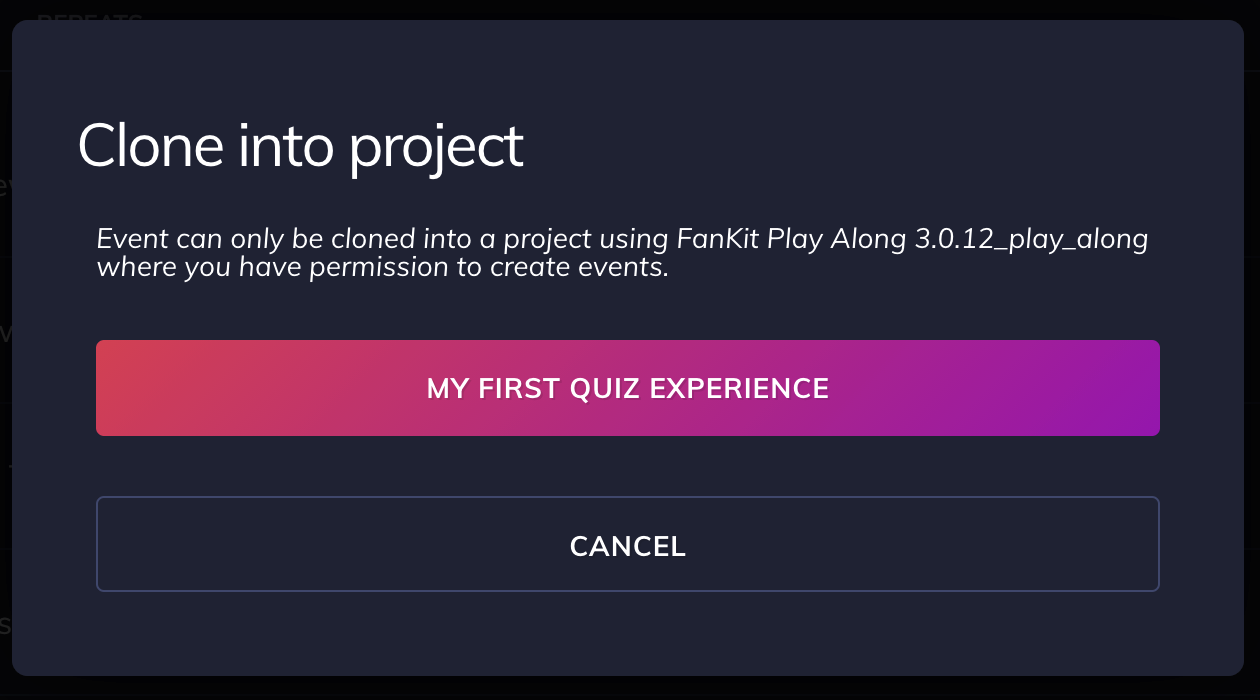
Cloning Events from one Project to another
If you have a Staging project which you've been using to test content, all you need to do is to clone the event from Staging into Production.
From the Schedule page, click on Clone into in the menu of the Staging event:
And select whichever project you have nominated as your Production Project. When you click on the project name the entire event is cloned in the Production project and ready to be published.
Correcting a mistake
If you need to quickly edit some text or change an image, find the element in the ‘Current’ or ‘Past’ tab under the timeline, rollover the cog and select ‘Edit’. Make your update and you can save it. Updates will appear immediately.
Last updated